
{% label 声明: red %} 绝大部分的样式都是hexo butterfly的原生样式,本人只是将功能在typecho中做了相应的移植。{% link Butterfly,Butterfly,https://butterfly.js.org/ ...
阅读全文...

堆叠轮播图(color ui原生小程序代码优化)
{% note info simple %}界面内容并非本人原创,只是适配了原生小程序代码{% endnote %}最近找了一些小程序的组件库,发现了Color UI界面和色彩搭配都比较符合我的需求,但是在进一步了解的时候发现这个项目已经停更了很长时间,...
阅读全文...
阅读全文...

使用MySql触发器简化各表数据操作
触发器基本语法生成一个触发器CREATE TRIGGER 触发器名 触发事件(BEFORE|AFTER INSERT|UPDATE|DELETE)
ON 表名 FOR EACH ROW
触发器激活后需要执行的语句一些注意事项同一个数据库中不能创建同名触...
阅读全文...
阅读全文...

CSS实现水波纹扩散效果
主要CSSanimationtransform: scale()opacitynth-child()效果展示代码<div>
<style>
.ripple {
width: 200p...
阅读全文...
阅读全文...

NextCloud无法上传大文件问题解决
NextCloud无法上传大文件问题解决限制NextCloud上传大文件的主要因素有两个,一个就是上传文件的大小,以及文件上传超时时间。修改PHP文件上传限制查看PHP配置文件路径php -i |grep php.ini修改文件中的upload_max_...
阅读全文...
阅读全文...

SSM开发环境搭建(小白自用)
前言将SSM作为后端的的一个项目即将完工,在开发过程中踩了很多坑,与此同时也学习到了新知识,有了不小收获。在遇到麻烦和解决麻烦的路上,受到了很多分享教程博主的帮助。为了将帮助延续下去,我也将自己SSM环境配置的过程做了简单的纪录、分享。系统软件版本Win...
阅读全文...
阅读全文...
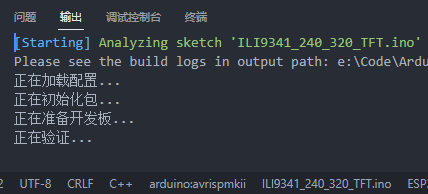
ESP32通过SmartConfig扫码配网
前引对于ESP配网方式和SmartConfig的介绍,在ESP-IDF编程指南中已经介绍得很详细了,这里就不在赘述。{% link ESP配网API,ESPRESSIF,https://docs.espressif.com/projects/esp-id...
阅读全文...
阅读全文...

Linux安装指定版本Nodejs
安装nodejs通过Linux自带软件库安装的nodejs往往版本较老可以通过设置代理更新nodejs软件版本curl -sL https://deb.nodesource.com/setup_18.x | sudo bash -需要安装哪个版本就设置s...
阅读全文...
阅读全文...
双系统时间不一致问题解决(Win和Linux)
{% note info simple %}本文内容只为方便自己平时查找使用,并非原创性内容{% endnote %}在Linux中使用命令sudo timedatectl set-local-rtc 1将Linux系统时间和BIOS时间同步。sudo ...
阅读全文...
阅读全文...
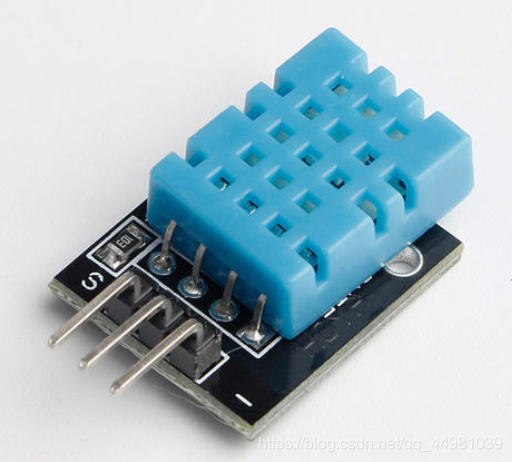
DHT11模块 Arduino代码补充
前引Arduino中已经有关于DHT11的库,但是为了理解模块的运行原理,而写了这个代码,代码中的不足之处还请多多指正。关于DHT11的原理,在之前的文章中已经提到过,就不再赘述。{% link DHT11温湿度模块部分代码实例,Mstzf,https:...
阅读全文...
阅读全文...

最新文章


最新评论

管理控制台本身占用不大,我在一台2核2G的服务器上搭建,四五个人...
Mango / 2025-07-3 6:51

请问这个管理控制台占用怎样,因为云服务器配置不高,然后这个可以开...
shang / 2025-07-1 3:39
博客样式和功能已经做了比较多的完善,有很多参考了别人的创意,参考...
Mango / 2024-07-24 13:54
二叉树的遍历看这个图真的特清晰 ::aru:shy2::
Mango / 2024-07-18 10:30
怎么会有人蠢到上传代码没有提交审核,睡前才想起来 ::aru:c...
Mango / 2024-05-12 18:18
很多事情坚持很重要,不需要做的有多好,但是一定要坚持去做。愿你的...
Mango / 2024-05-11 16:37