

前引关于AdGuard Home及其使用方法,网上已经有很多优秀文章做过详细介绍;我这里想要分享的是如何在树莓派开启热点后如何搭配dnsmasq使用。相关软件:DockerAdGuard Homednsmasq安装编辑docker-compose.yml...
阅读全文...

编译安装带 Brotli 压缩的 Nginx
安装依赖apt install dpkg-dev curl gnupg2 build-essential zlib1g-dev libpcre3 libpcre3-dev unzip cmake -y下载编译源码添加nginx源码库添加 Nginx 密钥...
阅读全文...
阅读全文...

树莓派+EC20模块实现连接蜂窝网和短信收发
软硬件树莓派ec20wvdialgammuSIM卡EC20模块概述EC20-CE是移远通信最近推出的LTE Cat 4无线通信模块,采用LTE 3GPP Release 11 技术,支持最大下行速率 150 Mbps和最大上行速率50 Mbps;同时在封...
阅读全文...
阅读全文...
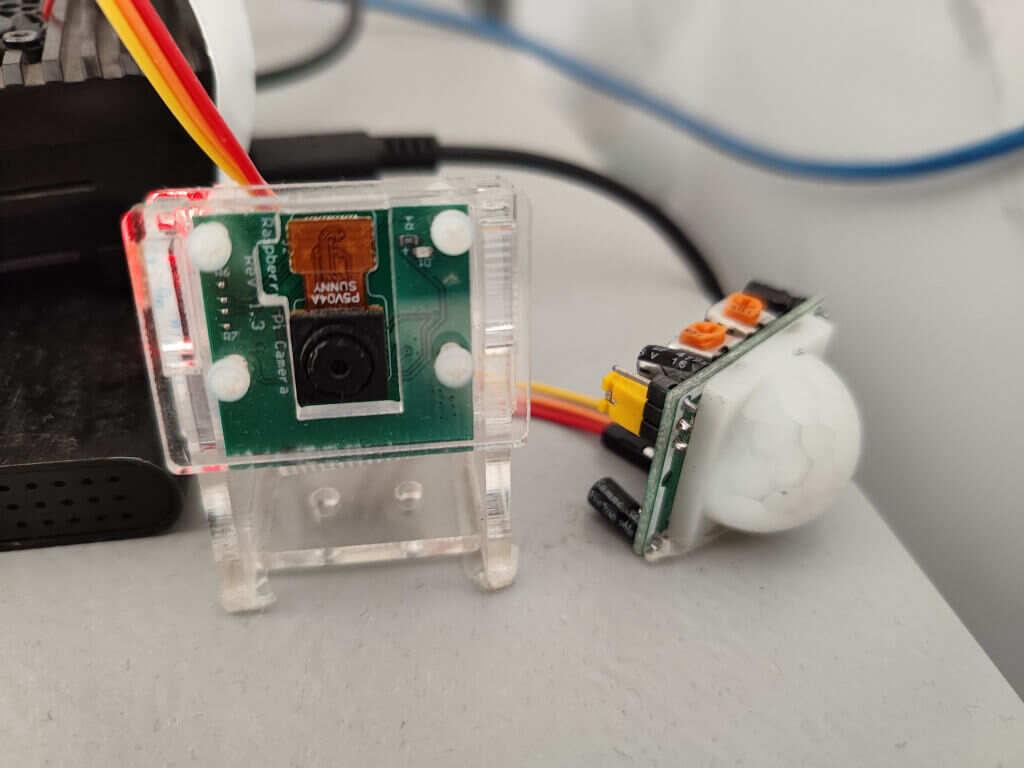
树莓派访客拍照C语言版
前引不知道因为什么原因Picamera2包调用摄像头拍照,在一个程序中达到一定次数之后就会导致系统的内存泄漏,除了重启软件没有什么好的方法来解决,但作为一个监控性质的软件,经常发生这种错误还是比较无法接受的事情。因此决定看看能不能直接使用C语言来完成监控...
阅读全文...
阅读全文...

远程访问本地搭建的NextCloud(反向代理网页)
前言在没有公网IP的情况下,很难从其他网络环境中直接访问到部署在本地的web服务,这时候就需要通过内网穿透的方式来实现。而对于内网穿透,有着很多的实现方式,最为常见的就是通过云服务器搭建和使用别人提供的服务自建内网穿透服务需要有自己的云服务器服务端和客户...
阅读全文...
阅读全文...

SSM开发环境搭建(小白自用)
前言将SSM作为后端的的一个项目即将完工,在开发过程中踩了很多坑,与此同时也学习到了新知识,有了不小收获。在遇到麻烦和解决麻烦的路上,受到了很多分享教程博主的帮助。为了将帮助延续下去,我也将自己SSM环境配置的过程做了简单的纪录、分享。系统软件版本Win...
阅读全文...
阅读全文...
ESP32通过SmartConfig扫码配网
前引对于ESP配网方式和SmartConfig的介绍,在ESP-IDF编程指南中已经介绍得很详细了,这里就不在赘述。{% link ESP配网API,ESPRESSIF,https://docs.espressif.com/projects/esp-id...
阅读全文...
阅读全文...

饥荒联机服务器搭建(本地、云服务器、双云服务器)
前引饥荒联机是一个制作精良的“多人联机”生存游戏,游戏在可玩性上没得说,但是由于房主PC性能和网络等各种不确定性原因,导致联机体验特别糟糕。对于联机卡顿的情况,可以通过搭建饥荒联机服务器来解决。我会比较详细的介绍饥荒联机服务器搭建的过程,其中包括本地服务...
阅读全文...
阅读全文...

Linux安装指定版本Nodejs
安装nodejs通过Linux自带软件库安装的nodejs往往版本较老可以通过设置代理更新nodejs软件版本curl -sL https://deb.nodesource.com/setup_18.x | sudo bash -需要安装哪个版本就设置s...
阅读全文...
阅读全文...
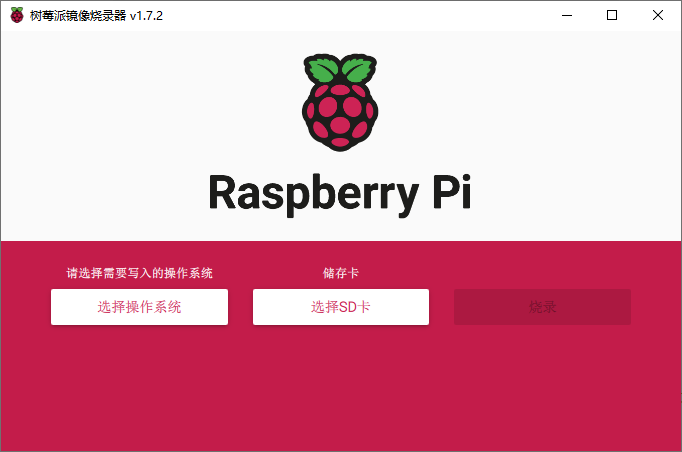
树莓派烧录系统不再折腾
把树莓派作为路由器之后,很长一段时间都没有再折腾树莓派上的东西。最近准备用树莓派做一个人脸识别的系统,就去树莓派官网 准备下载个新的系统,树莓派的官方烧录软件居然更新了。在之前的版本中,界面是英文的、而且只能对TF卡格式化和烧录系统,在没有桌面显示器的情...
阅读全文...
阅读全文...
最新文章


最新评论

管理控制台本身占用不大,我在一台2核2G的服务器上搭建,四五个人...
Mango / 2025-07-3 6:51

请问这个管理控制台占用怎样,因为云服务器配置不高,然后这个可以开...
shang / 2025-07-1 3:39
博客样式和功能已经做了比较多的完善,有很多参考了别人的创意,参考...
Mango / 2024-07-24 13:54
二叉树的遍历看这个图真的特清晰 ::aru:shy2::
Mango / 2024-07-18 10:30
怎么会有人蠢到上传代码没有提交审核,睡前才想起来 ::aru:c...
Mango / 2024-05-12 18:18
很多事情坚持很重要,不需要做的有多好,但是一定要坚持去做。愿你的...
Mango / 2024-05-11 16:37