前引在小程序项目中经常有要自定义navbar的需求,网上有很多大佬分享的教程,但有的不太兼容,有的又写的比较麻烦,这里分享一种本人在用兼容性较好而且代码比较简单的一种写法。原理解释微信小程序navbar头部可以拆分为几部分构成:状态栏高度、胶囊高度、胶囊...
阅读全文...

Java使用SXSSFWorkbook导出Excel工具类
列 1col2 (列2)col3 前引在项目中经常有导出Excel的需求,为了方便就封装了一个导出Excel到前端的工具类,使用下来还比较好用使用JDK版本:1.8spring boot版本:2.6.15前端请求:axiosJava代码Exce...
阅读全文...
阅读全文...

keep-alive使用记录(返回界面不刷新)
前引keep-alive是vue自带的一个内置组件,可以实现缓存包裹在其中的动态切换组件。{% link Vue,Built-in Components,https://cn.vuejs.org/api/built-in-components#keepa...
阅读全文...
阅读全文...
NextCloud更新404解决办法
前引最近两个版本的NextCloud更新时更新器出现404导致无法更新之前的版本都正常解决办法:使用命令手动更新通过手动运行更新命令,更新nextcloud版本在nextcloud根目录中运行命令:sudo -u www-data php updater...
阅读全文...
阅读全文...
为你的Typecho博客添加一个访问统计
前引在之前的静态Hexo 中借助的是第三方的统计平台,现在转到动态博客下,有了自己的数据库就没有必要再使用第三方的统计;于是就有了typecho访问统计插件TeohVistgithub地址:{% link github,TeohVisit,https:/...
阅读全文...
阅读全文...

TeoTag:在typecho中使用和butterfly一样的外挂标签
{% label 声明: red %} 绝大部分的样式都是hexo butterfly的原生样式,本人只是将功能在typecho中做了相应的移植。{% link Butterfly,Butterfly,https://butterfly.js.org/ ...
阅读全文...
阅读全文...
堆叠轮播图(color ui原生小程序代码优化)
{% note info simple %}界面内容并非本人原创,只是适配了原生小程序代码{% endnote %}最近找了一些小程序的组件库,发现了Color UI界面和色彩搭配都比较符合我的需求,但是在进一步了解的时候发现这个项目已经停更了很长时间,...
阅读全文...
阅读全文...

使用MySql触发器简化各表数据操作
触发器基本语法生成一个触发器CREATE TRIGGER 触发器名 触发事件(BEFORE|AFTER INSERT|UPDATE|DELETE)
ON 表名 FOR EACH ROW
触发器激活后需要执行的语句一些注意事项同一个数据库中不能创建同名触...
阅读全文...
阅读全文...

CSS实现水波纹扩散效果
主要CSSanimationtransform: scale()opacitynth-child()效果展示代码<div>
<style>
.ripple {
width: 200p...
阅读全文...
阅读全文...
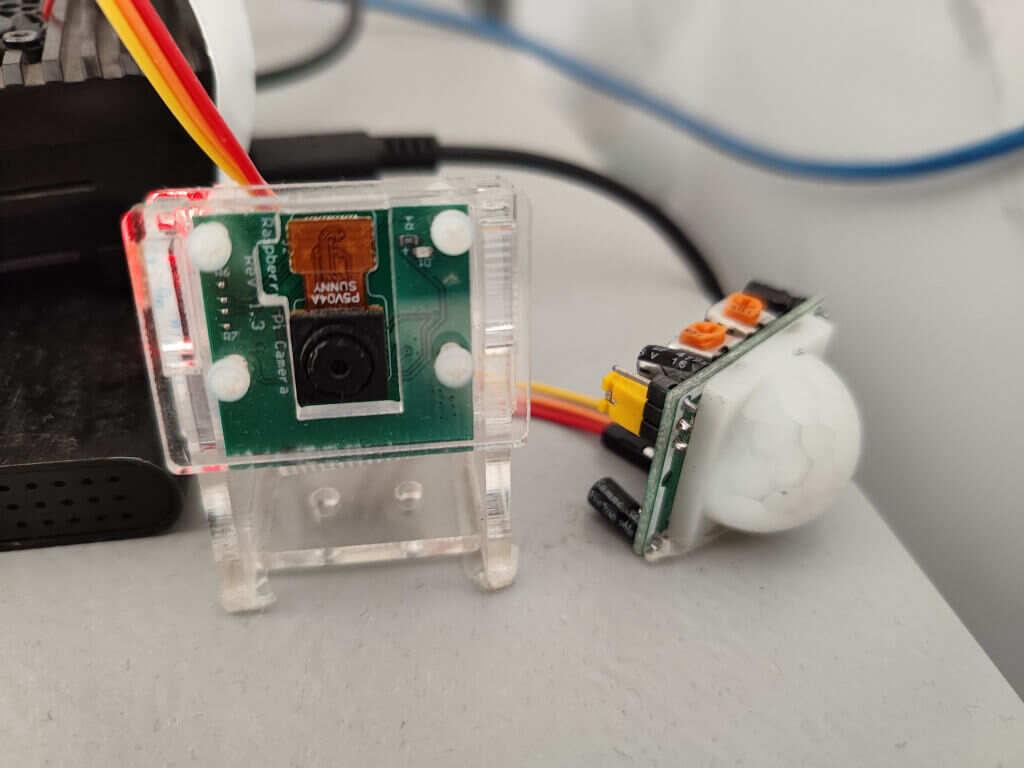
树莓派访客抓拍视频版
前引由于在对移动的人体进行拍照的效果并不好,所以对抓拍图片版进行了升级,通过人体红外感应器在来访人员进入房间后录制视频,视频能比较好的看清来访人员起到看家的作用。拍照版{% link 树莓派64位系统实现对访客抓拍,Mstzf,https://mstzf...
阅读全文...
阅读全文...

最新文章


最新评论

管理控制台本身占用不大,我在一台2核2G的服务器上搭建,四五个人...
Mango / 2025-07-3 6:51

请问这个管理控制台占用怎样,因为云服务器配置不高,然后这个可以开...
shang / 2025-07-1 3:39
博客样式和功能已经做了比较多的完善,有很多参考了别人的创意,参考...
Mango / 2024-07-24 13:54
二叉树的遍历看这个图真的特清晰 ::aru:shy2::
Mango / 2024-07-18 10:30
怎么会有人蠢到上传代码没有提交审核,睡前才想起来 ::aru:c...
Mango / 2024-05-12 18:18
很多事情坚持很重要,不需要做的有多好,但是一定要坚持去做。愿你的...
Mango / 2024-05-11 16:37